Freenas Hardware Build
24 Apr 2012
1TB of Redundant Storage for < $450 == woot!
In this post I’ll be documenting how I built a FreeNAS server for around $440. That’s with all new hardware, none of this “I built a brand new NAS for $100 (because I only had to buy a sound card)” crap…
Server Requirements
These were my requirements for my NAS server:
- 2 TB total storage (1 TB effective storage, in a ZFS mirror configuration)
- Low power
- Quiet
I’m happy to say that I was able to achieve all of those requirements with all new hardware and still stay under my budget of $450.
Parts List
Part list permalink / Part price breakdown by merchant
| Type | Item | Price |
|---|---|---|
| Motherboard | Asus E35M1-I Mini ITX E-350 Motherboard | $101.97 @ Newegg |
| Memory | Patriot G Series Sector 5 Edition 8GB (2 x 4GB) DDR3-1333 Memory | $14.99 @ Microcenter |
| Hard Drive | Seagate Barracuda 1TB 3.5” 7200RPM Internal Hard Drive | $94.99 @ NCIX US |
| Hard Drive | Seagate Barracuda 1TB 3.5” 7200RPM Internal Hard Drive | $94.99 @ NCIX US |
| Case | Lian-Li PC-Q08A Mini ITX Tower Case | $94.99 @ NCIX US |
| Power Supply | Antec 380W ATX12V / EPS12V Power Supply | $41.99 @ SuperBiiz |
| Total | ||
| Prices include shipping and discounts when available. | $443.92 | |
| Generated 2012-02-19 02:15 EST-0500 |
I really need to give props to the good folks over at r/buildapc. I received some great tips regarding hardware I should buy as well as some friendly troubleshooting when I had a power-supply glitch. Another resource that was insanely useful was the pcpartpicker website. I wouldn’t have been able to build this system for this cheap without that amazing site.
The Build
Sadly, despite being a long-time computer enthusiast and a Computer Engineer by trade this was my first PC build, so I was a little nervous that I was going to mess something up and end up with a $400 scrap heap. Fortunately, everything went fairly smoothly. The only hiccup I encountered was when the original power supply I chose (a fanless 350W from Sparkle) died within 5 minutes of turning it on. I returned it and got the Antec listed above with no regrets.
Overall, the build went smoothly. It was a simple matter of following the various manuals and plugging the right wires into the right places. No black magic here.

Happy day.

Mounting the motherboard to the case
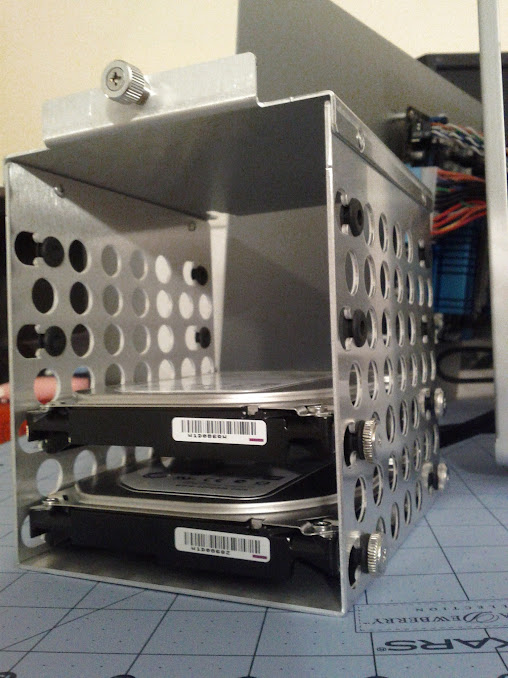
The hard drives

All wired up
FreeNAS Installation
Installing FreeNAS was as simple as
dd‘ing the image to a thumb drive,
configuring my BIOS to boot it, and then clicking through the FreeNAS
web interface.
I’m currently working on building my own custom FreeBSD-based NAS
system using
nanoBSD
since I would like to be able to customize the installation a bit
more. Specifically, I want to run handbrake and an http server on my
NAS and haven’t found an easy way to do that through FreeNAS. I’ll be
sure to write about it here when I get it working. I’ve heard of some
people using jails that reside in their storage pool, but I don’t
think I want to go that route. If you’re running FreeNAS with custom
software please drop me a comment!
Benchmarks
Data Transfer
My benchmarking method was to transfer a 1GB file to the NAS via NFS.
I was able to max out the 100 Mb/s NIC on my desktop machine:
$ dd if=/dev/zero of=1GB.dat bs=1GB count=1
$ time cp 1GB.dat /media/space/

real    1m27.435s
user    0m0.018s
sys     0m3.391s
That’s 1 Gigabyte in ~87 seconds, so we’re looking at about 11.5 MB/s, or 91 Mb/s. I performed the same test several times and my timings never varied by more than a few hundred milliseconds. After factoring in the overhead of the network stack of my OS I think it’s safe to assume that the NIC was saturated. In other words, I don’t really know how fast this thing is capable of moving… But it’s at least 100 Mb/s :).
The system also handled the load with no problems at all. Here’s the
output of uptime at the very end of the transfer:
8:48PM up 11 days, 8:54, 1 user, load averages: 0.52, 0.17, 0.06
Since this is a dual-core machine a .5 load average means that 1 cpu was half-loaded.
Power Consumption
TODO. Time to check out a Kill-a-Watt from the local library again :)…
Links
Projects
Work
- Co-Founder & CEO of Directangular, LLC.
- Previously: Linux Kernel development at Qualcomm, and embedded software at L3. You can view my upstreamed Linux kernel patches here.
- Wild blue yonder: Creating and contributing to a variety of Open Source projects. See my GitHub profile.
 Subscribe with Atom